
Set up, dial in temperature, pressure and dwell, and fix ghosting or flaking - 7-step operator guide.
Table of Contents
- What a hot foil stamping machine actually does
- Step 1 — Pre-flight safety and machine check
- Step 2 — Mount the die
- Step 3 — Load the hot stamping foil
- Step 4 — Dial in temperature, pressure, and dwell
- Step 5 — Pull your first proof and read it
- Step 6 — Run production and monitor
- Step 7 — Shutdown and care
- Common defects and their fixes
- How long until you're proficient?
- How do you measure the real die temperature?
- What makeready and registration tolerances should you hold?
- How much foil will the job consume?
- How do you run foil-over-foil and combination stamping?
- What preventive maintenance schedule keeps quality stable?
- Which safety rules apply?
- Quick-reference: starting settings by substrate
- Frequently Asked Questions
Quick answer: To use a hot foil stamping machine, mount and level the die, load the foil with correct tension, set the platen to 80-200 C for your foil grade, apply 1-3 t (manual) up to 80-300 t (automatic) pressure with a 0.3-1.5 s dwell, pull a proof sheet, then adjust one variable at a time until the foil releases cleanly with sharp edges.
Learning how to use a hot foil stamping machine takes about an hour for safe setup and 1–2 production runs to dial in clean, sharp foil transfer. This guide walks you through the exact sequence operators at All-in Pack use on our XG1080G automatic hot stamping machine and most other heated-platen units: machine prep, foil loading, die mounting, temperature/pressure/dwell tuning, the first proof, troubleshooting common defects, and end-of-shift care.
What a hot foil stamping machine actually does
A hot foil stamping machine presses a heated metal die against a hot stamping foil ribbon, transferring the foil's pigment or metallic layer onto paper, board, plastic, leather, or fabric. Three variables — temperature, pressure, and dwell time — control the result. Get them in balance and you get a sharp, fully-adhered image; out of balance you get filling-in, ghosting, flaking, or burn marks.
Three machine families operate the same way:
- Manual / tabletop presses — 1–3 t pressure, for small labels and craft work
- Semi-automatic clamshells — 5–25 t, mid-volume packaging
- Fully automatic flatbed machines like the XG1080G — 80–300 t, full-sheet folding cartons at 5,000+ sheets/hour
Whichever class you run, the operating logic in this guide applies.
Step 1 — Pre-flight safety and machine check
Before you power on, do a 5-minute pre-flight every shift:
- Wear PPE. Heat-resistant gloves and safety glasses. Hot platens reach 80–200 °C (175–390 °F) and dies stay hot for 10+ minutes after shutdown.
- Confirm the E-stop works by tripping and resetting it.
- Check the die-mounting plate is clean — no foil debris, no dried adhesive, no warped surface. A 0.05 mm warp will print uneven.
- Inspect the foil unwind and rewind shafts. Bearings smooth, no foil tails wrapped around them.
- Verify substrate guides and grippers are set to the sheet size you're about to run.
- Top up the chiller or oil reservoir if your machine uses one.
Skipping this check is the single most common cause of first-hour reprints.
Step 2 — Mount the die
The die is what transfers your artwork. Most production foil work uses magnesium (short runs), copper (mid-volume), or brass (long-run hard dies).
- Mount the die centrally on the heated platen using the alignment bolts or magnetic chase.
- Torque the mounting bolts evenly in a star pattern — uneven torque is the #1 cause of one-side-light/one-side-heavy stamping.
- Slide a 0.1 mm feeler gauge under each corner of the die to confirm parallelism to the impression plate. Re-shim if a corner is high.
- Lower the platen onto a blank sheet at room temperature and check the impression pattern. You should see uniform contact across the whole die face.
Step 3 — Load the hot stamping foil
Always match the foil to the substrate. Standard pigment foils work on coated paper and board; specialty grades exist for polypropylene, PVC, leather, and fabric. If you're unsure which to spec, see our hot stamping foil supplier guide or browse the foil catalog.
- Mount the foil roll on the unwind shaft with the dull (release) side up and the shiny pigment side down toward the substrate.
- Thread the foil under the guide rollers, across the die path, and onto the rewind shaft. Most automatic units have a printed threading diagram on the side panel.
- Set the foil pull length equal to the longest die dimension plus 5–10 mm safety margin. Too short and you'll overlap stamps on the same patch; too long and you waste foil — the single biggest controllable cost on this process.
- Set the foil index direction (longitudinal or lateral) to match your die layout for maximum yield.
Step 4 — Dial in temperature, pressure, and dwell
This is where 80% of operator skill lives. Use this as your starting matrix:
| Substrate | Temperature | Pressure | Dwell |
|---|---|---|---|
| Coated paper / SBS board | 110–130 °C | 1.5–3 t | 0.6–1.0 s |
| Uncoated paper | 130–150 °C | 2–4 t | 0.8–1.2 s |
| PVC / PET / synthetic stock | 90–110 °C | 1–2 t | 0.4–0.8 s |
| Leather (genuine) | 90–120 °C | 1.5–2.5 t | 1.0–1.5 s |
| Coated cotton / textile | 130–160 °C | 2–3 t | 1.5–2.0 s |
These are starting points only — the exact window depends on foil grade, die area, and ambient humidity.
Tuning sequence (always in this order):
- Set temperature first and let the platen stabilize for at least 10 minutes before the first proof.
- Start with pressure at the low end.
- Set dwell to the middle of the range.
- Run a proof; adjust pressure ±0.5 t before touching temperature.
- Only change temperature in ±5 °C steps; wait 5 minutes between adjustments.
Step 5 — Pull your first proof and read it
Stamp three sheets back-to-back, then evaluate against these checks:
- Edges should be sharp, not feathered. Feathered = too much heat or pressure.
- Solid fill should be uniform. Gaps or pinholes = too little pressure, dwell too short, or foil incompatible with substrate.
- Foil release should be clean. If foil is still on the carrier where it should have transferred, increase temperature 5 °C OR dwell by 0.1 s.
- No "ghosting" on the matrix — ghost images on the spent foil mean dwell is too long.
- Tape test. Press a strip of pressure-sensitive tape over the stamped image, peel sharply at 180°. Foil should stay on the substrate. Lift = adhesion failure.
When the proof passes all five checks, lock the settings into the recipe library on your machine (every modern automatic unit has one — use it).
Step 6 — Run production and monitor
During the run, sample one sheet every 100–200 impressions for the first hour, then every 500 thereafter. Watch specifically for:
- Gradual lightening on one edge → die loosening, re-torque
- Foil registration drift → unwind tension creeping
- Temperature drift > 3 °C → platen heater issue, stop and call maintenance
Step 7 — Shutdown and care
- Lower foil pull to zero and engage the foil clutch lock so the roll doesn't unspool.
- Park the die on the cool-down pad — never drop a hot die into a metal tool tray.
- Wipe the platen with a brass brush only, never steel (steel scratches the chrome surface and ruins evenness).
- Log the production count and any anomalies in the machine logbook. This data is what lets you predict consumable replacement intervals.
Common defects and their fixes
| Defect | Most likely cause | Fix |
|---|---|---|
| Foil won't transfer | Temperature too low / pressure too low / wrong foil | Raise temp 10 °C; check foil grade vs substrate |
| Filling in fine detail | Pressure too high / temperature too high | Drop pressure 0.5 t first, then 5 °C |
| Foil flakes after cooling | Insufficient dwell / substrate too cold / wrong foil | Add 0.1 s dwell; pre-warm sheets if winter |
| Ghosting on carrier | Dwell too long | Reduce dwell 0.1 s |
| Diagonal density gradient | Die not parallel | Re-shim and re-torque the die |
| Burn marks on board | Temperature far too high | Drop 20 °C and rerun matrix |
How long until you're proficient?
A new operator running our XG1080G fully automatic hot stamping machine typically:
- Day 1: Safe setup, supervised first proof
- Week 1: Solo standard jobs on coated board
- Month 1: Independent troubleshooting and recipe building
- Month 3: Multi-substrate proficiency including PVC, leather, and registered foil-over-foil
If you're evaluating a new machine, our how to choose the right automatic hot stamping machine guide walks through tonnage sizing, registration accuracy, and what to verify on a factory acceptance test. To request operator training with delivery, contact our sales team and our engineers will include a 2-day on-site commissioning program.
How do you measure the real die temperature?
Measure at the die face, not the controller. The platen thermocouple sits inside the heater block, so the die face typically runs 8-15 C cooler than the number on the display, and a large brass die can lag by 20 C for the first 15 minutes.
- Use a surface (K-type ribbon) thermocouple pressed flat on the die face for 20 seconds.
- Infrared guns read polished brass and chrome badly (emissivity ~0.05); if you must use one, stick a matte high-temperature tape target on the die and aim at that.
- Log the offset once per die. From then on, set the controller to target + offset and you will hit the correct window on the first proof instead of the third.
- Re-check the offset after any heater cartridge replacement.
What makeready and registration tolerances should you hold?
Aim for +/-0.10 mm sheet-to-sheet registration on flatbed foil work and +/-0.15 mm on clamshell presses; anything looser will show on foil-over-print or foil-to-emboss jobs.
- Set the lay gauges and side guide to the same edges the printing press used - never a different reference edge.
- Pull a five-sheet registration ladder (first, 25th, 50th, 75th, 100th) and measure the image offset with a loupe or a 10x registration scale.
- Correct with the micro-adjust on the chase, not by moving the sheet guides, once the guides are square.
- For foil over UV or aqueous coating, run a coating adhesion test first: coatings with silicone slip additives above 0.5% will reject foil at any temperature.
- Record the makeready sheet count. A trained operator should hold 25-40 sheets of makeready waste on a repeat job; consistently above 100 means the die or the recipe library needs attention.
How much foil will the job consume?
Use this formula before you quote, because foil is normally 40-60% of the variable cost of a stamping job:
Rolls needed = (sheets x foil pull length in m) / (roll length in m x lanes per roll)
Worked example: 20,000 sheets, one 120 mm die, 5 mm safety margin, 610 m roll, 4 lanes cut from the web:
- Pull length per sheet = 0.125 m
- Total web = 20,000 x 0.125 = 2,500 m
- Rolls = 2,500 / (610 x 4) = 1.03 rolls
Three levers cut that number: multi-lane indexing (splitting one wide roll into lanes), step-and-repeat foil saving on machines with programmable pull, and choosing the shortest die axis as the index direction. Together they routinely save 25-35% of foil on ganged label work. Browse grades and web widths in the hot stamping foil catalog.
How do you run foil-over-foil and combination stamping?
Foil-over-foil (two colours in register) and combination stamp-and-emboss are the two jobs that separate a trained operator from a beginner.
- Foil-over-foil: run the larger, lighter-coloured area first and the smaller detail second. Drop the second-pass temperature by 10-15 C, because the first foil layer already carries a heat-activated size that will over-melt at full temperature.
- Allow the sheets to cool to room temperature between passes - stamping onto a 40 C sheet causes the first layer to lift.
- Combination die (stamp + emboss): the emboss cavity needs 20-40% more pressure than flat foil. Use a counterforce (make-ready) build-up on the impression plate, adding 0.1 mm phenolic shim at a time until the relief is full without cracking the fibre.
- Sculpted / multi-level brass dies need a slower dwell (1.2-1.8 s) so the deepest level reaches transfer temperature.
- Keep foil grain direction consistent with the sheet grain on textured board to avoid a striped appearance.
What preventive maintenance schedule keeps quality stable?
| Interval | Task | Why it matters |
|---|---|---|
| Every shift | Brass-brush the platen, check E-stop, clear foil scrap | Prevents debris impressions and fire risk |
| Weekly | Verify platen parallelism with a feeler gauge at 4 corners; grease unwind bearings | Stops diagonal density gradients |
| Monthly | Calibrate thermocouple against a surface probe; check foil tension rollers for flat spots | Keeps recipes repeatable across dies |
| Quarterly | Inspect heater cartridges and wiring, torque check the chase bolts, service the chiller | Avoids mid-run temperature drift |
| Annually | Full geometry survey, replace worn grippers, re-certify guards and interlocks | Maintains registration and operator safety |
Machines running two shifts should halve every interval above. Log each task in the machine book - the log is also what buyers of a used press ask for first.
Which safety rules apply?
Treat a heated-platen press as both a hot surface and a crush hazard. Guarding and interlocks should follow ISO 12100 risk-assessment principles, and light curtains or two-hand controls must be functionally tested on every shift. Hot dies stay above 60 C for 10+ minutes after shutdown, so a dedicated cool-down pad and heat-resistant gloves are mandatory, not optional.
Quick-reference: starting settings by substrate
| Substrate | Temperature | Pressure (flatbed) | Dwell time |
|---|---|---|---|
| Coated paper / art board | 100-130 C | Light-medium | 0.3-0.6 s |
| Uncoated / textured board | 120-150 C | Medium-high | 0.6-1.0 s |
| Laminated (matt/gloss film) | 90-120 C | Light | 0.3-0.5 s |
| UV-varnished stock | 130-160 C | Medium | 0.8-1.2 s |
| PVC / PET plastics | 110-140 C | Light-medium | 0.5-0.8 s |
| Leather / synthetic leather | 100-130 C | Medium | 1.0-1.5 s |
Treat these as starting points, confirm against your foil supplier data sheet, and change only one variable per proof sheet. For machine selection, tonnage sizing and factory acceptance testing, read the hot foil stamping machine buyer's guide, or ask our engineers for a setup review.
Need a press or foil for these settings? All-in Pack manufactures both the machines and the foil, so release and adhesion are matched before delivery. Compare formats on the hot foil stamping machine hub, or request a quote and our engineers will reply within 24 hours with a setup recommendation for your substrate.
Frequently Asked Questions
Quick answers about hot foil stamping machine.
Companion Products
Specs and samples for the products discussed in this article.
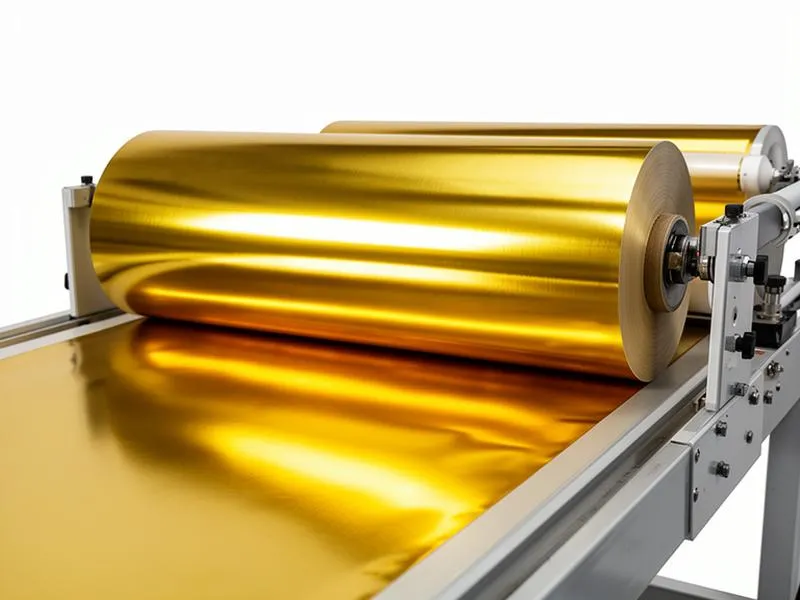
Premium Metallic Gold Hot Stamping Foil
Ultra-bright metallic gold foil with mirror-like reflection for premium packaging and label applications.
View product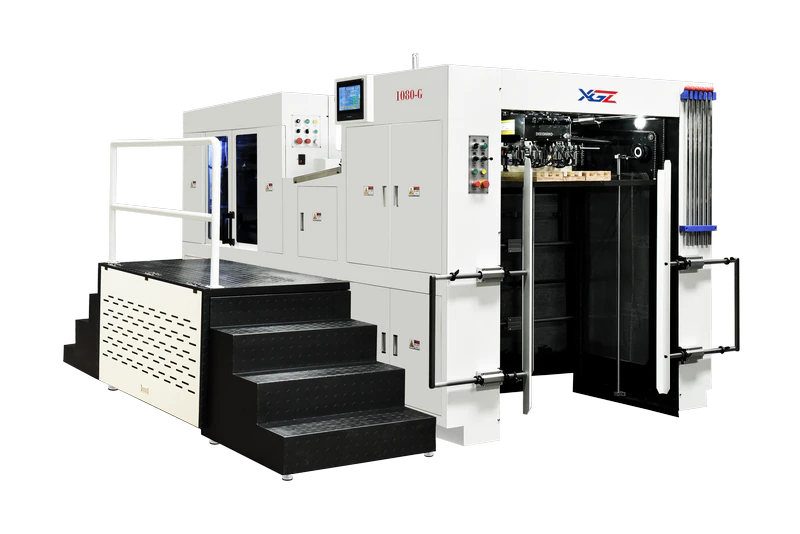
XG1080G Fully Automatic Hot Foil Blocking Machine (Hot Stamping Press)
Industrial hot foil blocking machine (also called a hot stamping press) with 5,500 sheets/hour throughput, 1060×740 mm max sheet size, 80-ton stamping pressure and ±2°C PLC temperature control — for paperboard, luxury packaging, book covers and security printing.
View product
Cold Stamping Foil
Cold stamping foil for inline UV flexo and offset presses — no heat, no dies, up to 150 m/min with metallic, holographic and pigmented finishes.
View productRelated Articles
View allTechnical Knowledge · Aug 25, 2026
Hot Stamping vs Heat Transfer vs Screen Printing: Which Machine Fits Your Job
A practical comparison of hot stamping machines, heat transfer presses and screen printing for decorating paper, board, plastic and textiles: substrate limits, per-piece cost, machine tiers from manual bench presses to fully automatic lines, and the questions buyers get wrong.
Technical Knowledge · Aug 28, 2026
XG1080G Fully Automatic Hot Stamping Machine: Field Review
A field review of the XG1080G fully automatic hot stamping machine: 5,000 sheets/hour, plus or minus 0.075mm registration, 160-tonne pressure and 6-zone heating, with real sustained throughput figures, landed-cost budgeting and honest guidance on who should not buy it.
Technical Knowledge · May 12, 2026
Hot Stamping Die Cutting Combo Machine: 2-in-1 Guide
Discover if a hot stamping and die cutting combo machine is right for your B2B needs. Optimize ROI, floor space, and productivity with this integrated solution.
Ready to source foil stamping and die-cutting from one supplier?
From stamping foils to post-press machines and die-cutting consumables — get factory-direct pricing and free samples.